 It’s almost that time of the year, again.
No, we’re not talking about the holidays. We’re talking about year-end tax prep. We’ve put together a process to help you set-up 1099’s in AX/D365, so they can be sent to vendors and to the IRS. As a reminder, the filing deadline is 1/31/18 for vendors and for the IRS whether you file electronically or by paper.
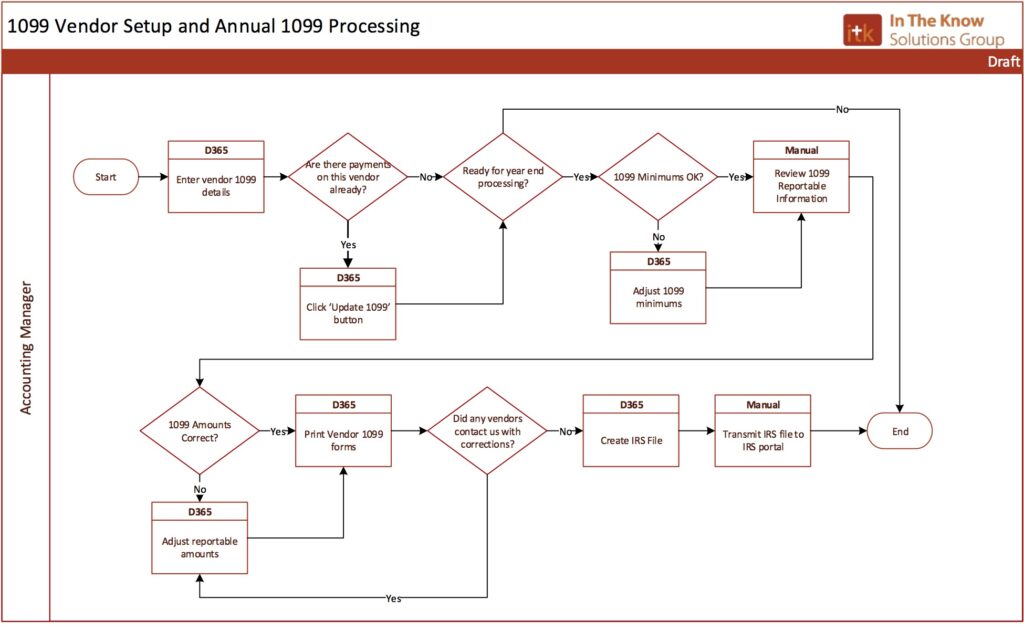
Process Overview:
1099 processing refers to reviewing and issuing IRS 1099 forms, both to the taxable recipient (vendor) and to the Internal Revenue Service. This document explains the activities in D365 related to 1099 processing.
Process Flow
User Roles: D365 Standard Roles:
| Accounting Manager (there are many roles but this one should cross over all forms shown here) | |
VENDOR SETUP
Setup for a 1099 vendor:
- Expand the Tax 1099 fast tab
- Select the Report 1099
Not applicable to 1099:
[Select the W-9 received box if the W-9 form has been received from the vendor]
Not applicable to 1099:
[Select the Check for W-9 box to verify that the vendor has submitted a W-9 form. If the vendor has not submitted a W-9 form, a warning message will appear when you create or update a vendor invoice]
- Enter the Federal tax ID
- Choose from the list of available Tax ID types
- Choose from the list of available 1099 boxes.
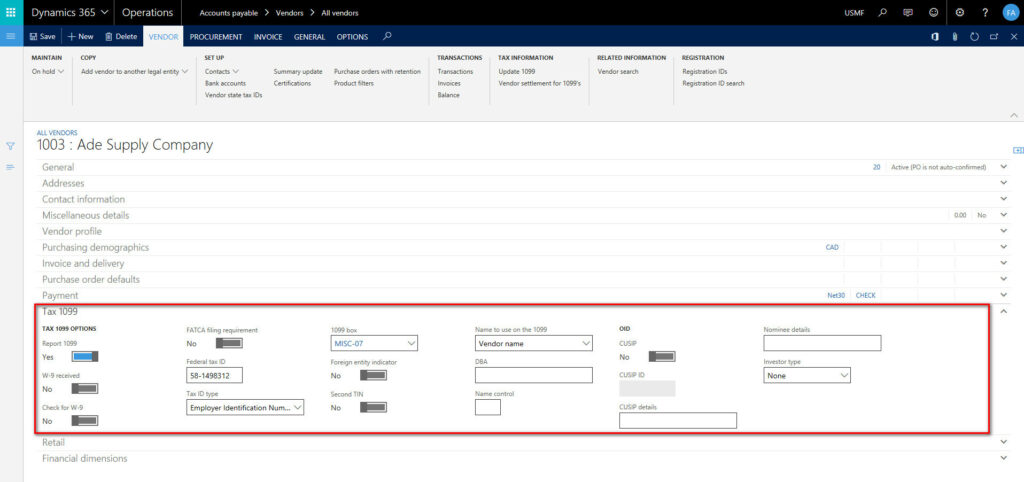
- If the organization is owned outside of the USA, select the Foreign entity indicator
- Select the Second TIN checkbox if you were notified by the IRS twice within 3 calendar years that the payee provided an incorrect taxpayer identification number (TIN)
- Select from the list of available choices in the Name to use on the 1099
- Enter the DBA if applicable.
- Enter the alphanumeric name control ID that the IRS requires to be printed on the mailing label to help validate the vendors EIN in the Name control

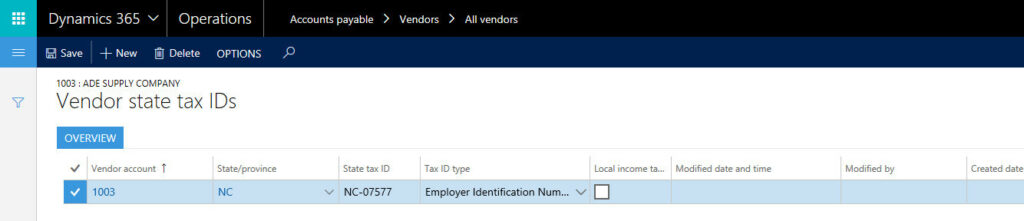
To set up state 1099 information, in the Action Pane, within the Vendor tab, select Vendor state tax IDs.

- From here, enter the information in this form.
The above setup makes all transactions for the vendor default to 100% reportable for 1099.
If we are just tagging the vendor for 1099 activity when we have already processed payments to this vendor (when 1099 reportable transaction have already occurred), D365 has provided a function to go back and mark these transactions as 1099 reportable:
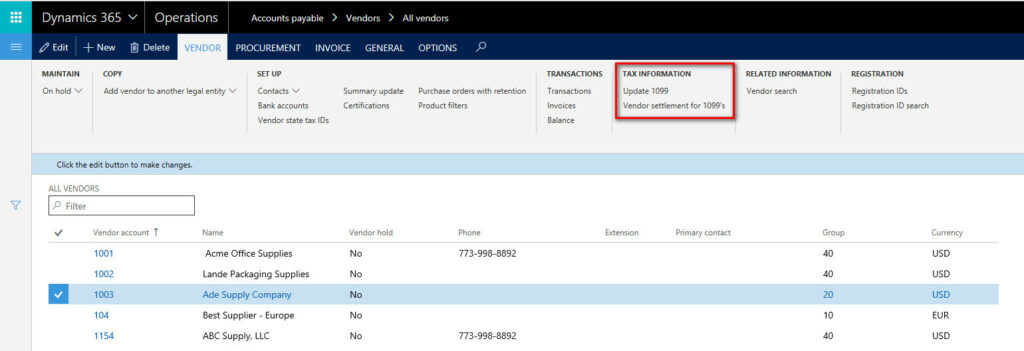
- The ‘Update 1099’ button updates all records. This function is very useful for tagging transactions for a vendor where we missed initially setting 1099 on. Note: if we have already tagged records as only partially 1099 reportable on this vendor, this will retag all records as 100% reportable, so use this function with care.
- The ‘Vendor settlement for 1099’s’ shows what records D365 has marked as reportable for this vendor. This is the same form accessed from the ‘Vendor settlement for 1099s’ all vendors view, explained further below.
Mark an invoice as only partially liable for 1099 reporting
After vendors are set up with 1099 information, all invoices naturally default to 100% of invoice amount as being 1099 reportable. If we want to only partially tag an invoice amount as 1099, follow the procedure below.
Enter the invoice as usual (the amount is #1), then click the ‘1099’ tab:
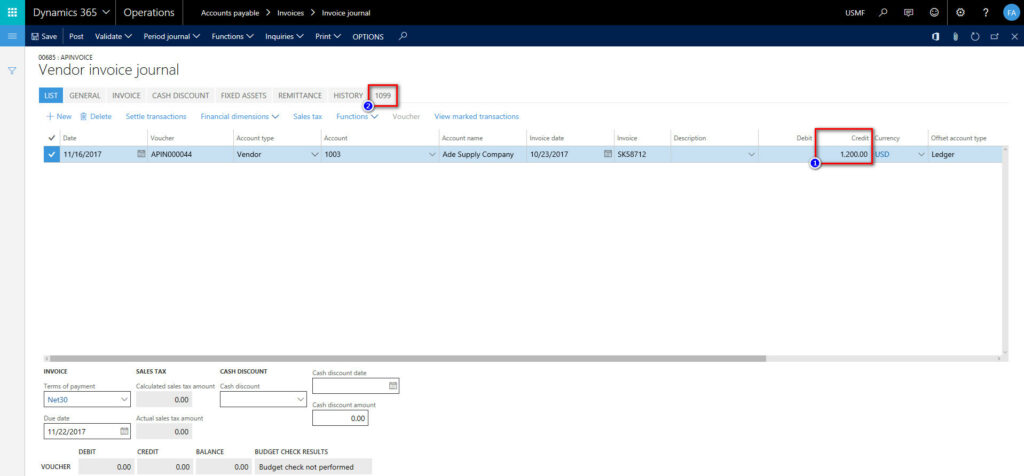
Fill in the amount subject to 1099 (note the negative sign for regular invoices).

After the invoice is paid, we can see that the proper reportable amount is shown.
1099 Processing and Year End Activities
Generally, 1099s are ready to process when all payables are paid through check date 12/31 of the year to be reported. 1099s are issued to any vendor who received a check dated during the year reported; 1099s are contingent upon check date, not invoice date.
The paper form to the vendor should be mailed by January 31st of the following year. The electronic file of 1099 payments is due to the Internal Revenue Service (IRS) by the last day of February of the following year (the 28th or 29th). The reason for the time between issuing the vendor form and transmitting to the IRS is to allow for any errors pointed out by vendors to be corrected prior to filing the 1099 information with the IRS.
Review 1099 minimums. These minimum reporting amounts rarely change, but D365 has provided a screen to review and adjust these. Verify with IRS documentation that the Tax 1099 field minimums are correct in D365.
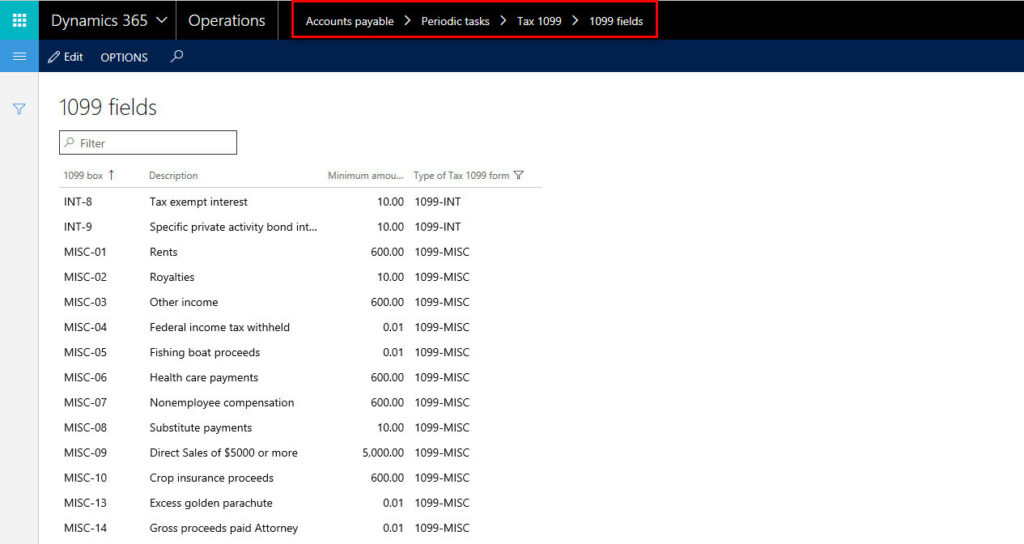
The minimum amounts can be adjusted to a higher or lower amount. For each vendor, D365 will issue a 1099 when the amount paid in a tax year exceeds the minimum for the tax year for the 1099 type.
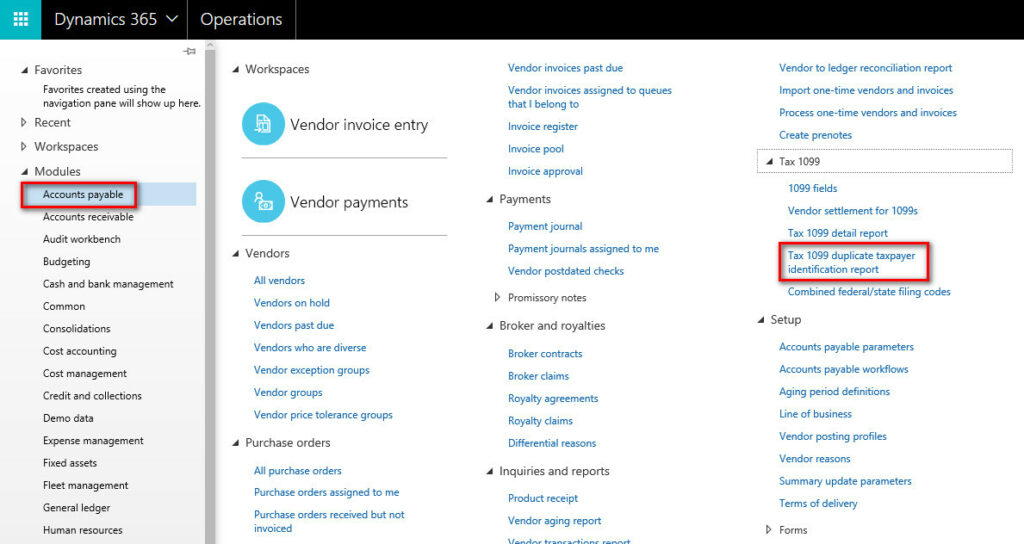
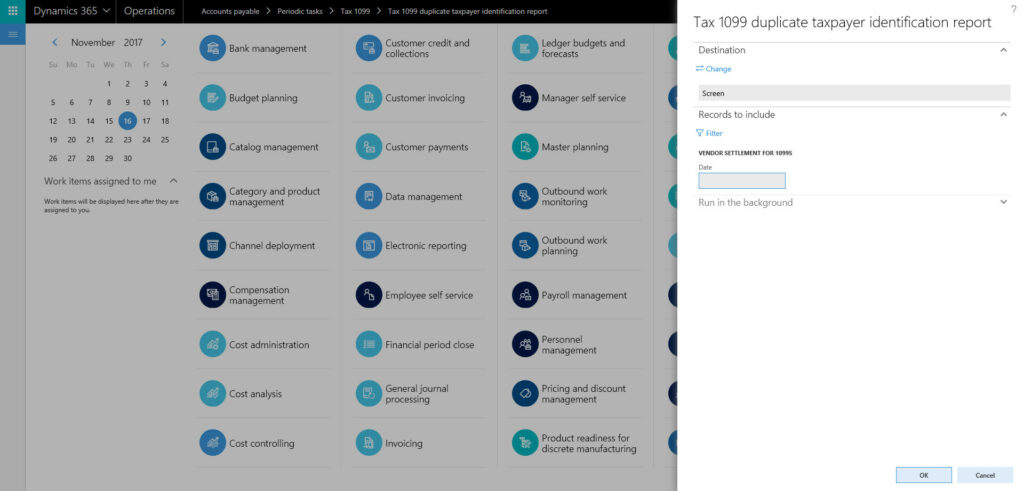
Review 1099s for duplicate taxpayer numbers. This would be when two vendors are using the same taxpayer number on their vendor record.

Review and adjust 1099 information.
Both summary and detailed review reports are provided within D365.
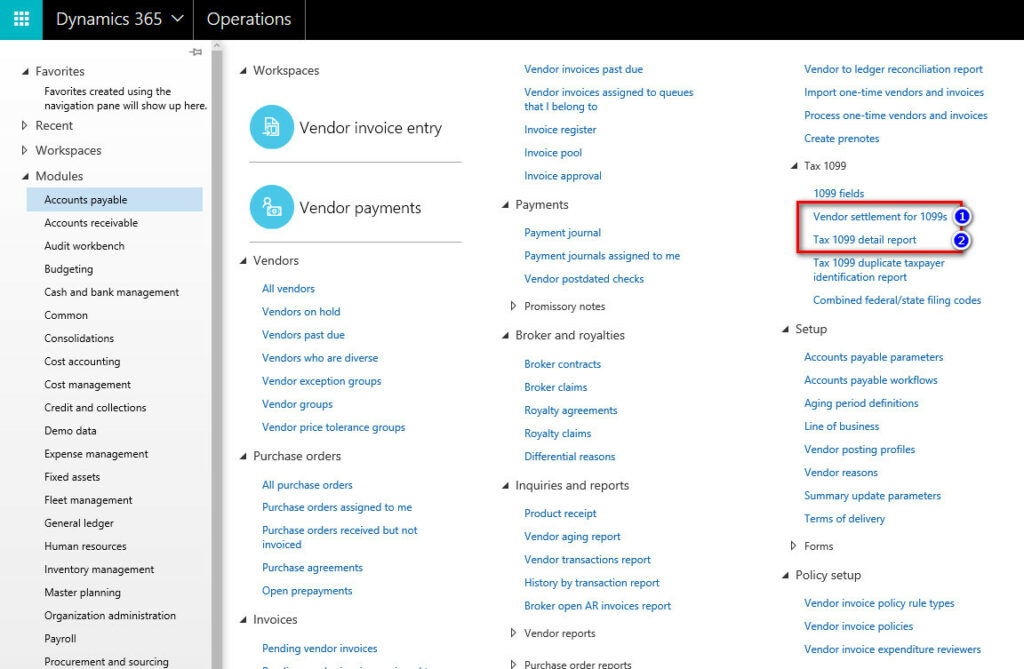 (1) Is a summary view of 1099 information listed by vendor
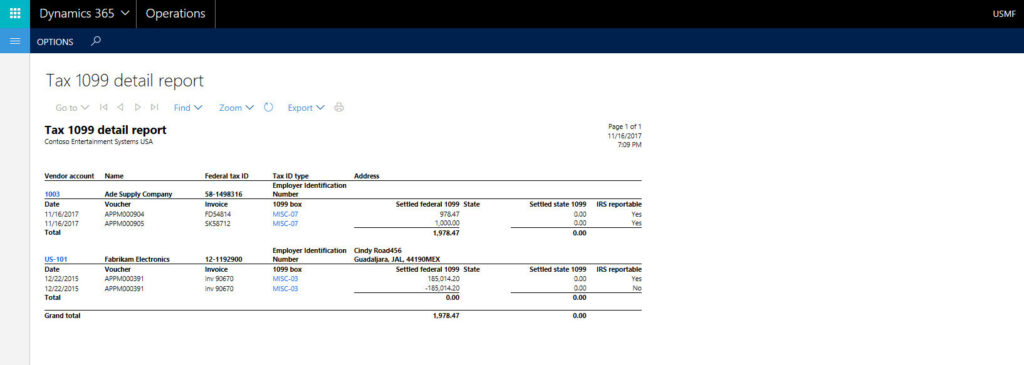
(2) Is a report that lists invoice information detail by vendor
(1) Vendor settlement for 1099s’ summary view:
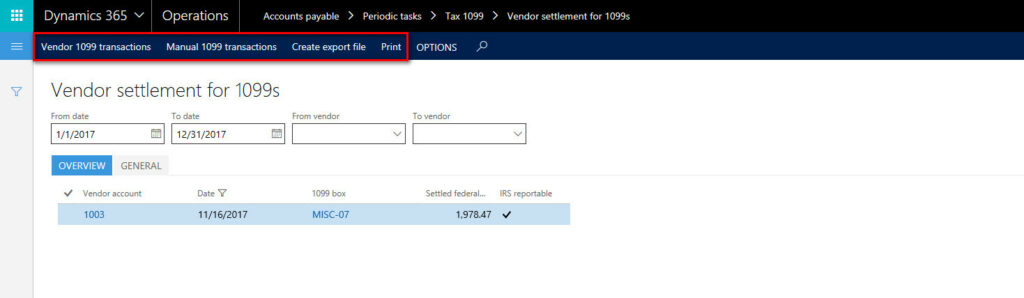
This form has multiple functions.
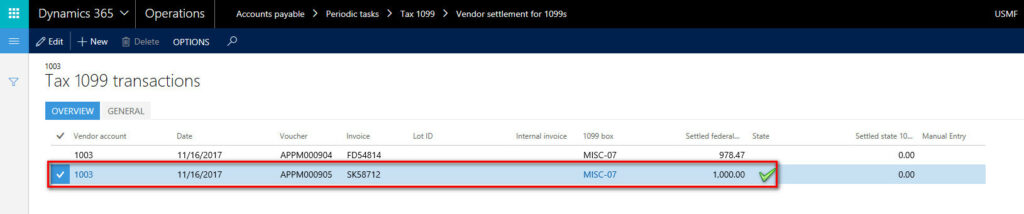
- Edit vendor reportable amounts. Click the ‘Vendor 1099 transactions’ button to open a form for the selected vendor. This allows specific transactions to be adjusted (that may not be 1099 reportable in full).
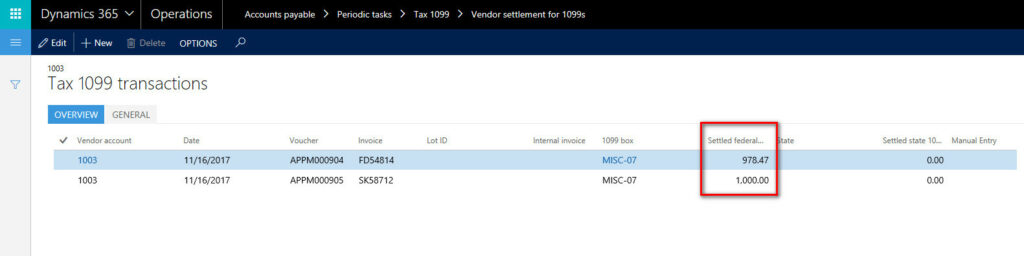
Use the ‘Edit’ button to adjust any of the settled amounts.
- Add manual reportable amounts. Click the ‘Manual 1099 transactions’ button to create a reportable transaction on a vendor that happened outside of D365 processing. This can be used for data migration (to capture legacy transaction prior to cutover) or to record activity from GL/another system that we want to report on from D365.
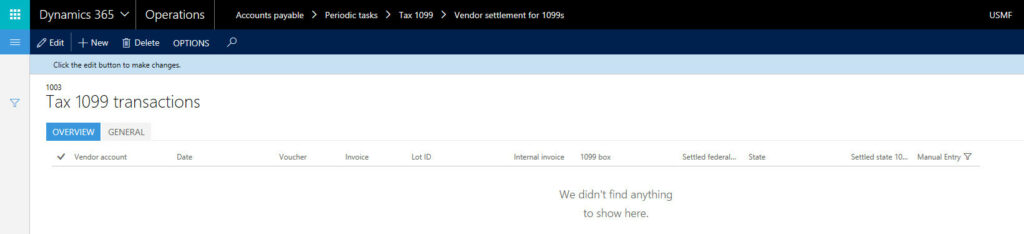
Use the ‘New’ button from this form to add a 1099 record.
- Create the export file for the IRS. Use the ‘Create export file’ to begin the process of IRS reporting (covered in detail later in this document).
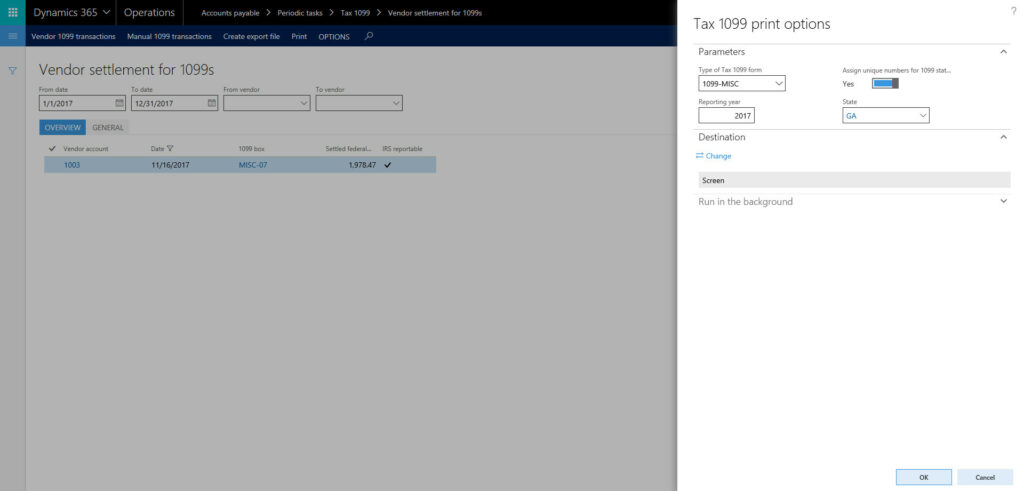
- Print vendor 1099 forms. Use this form, when ready, to print the vendor forms to mail.
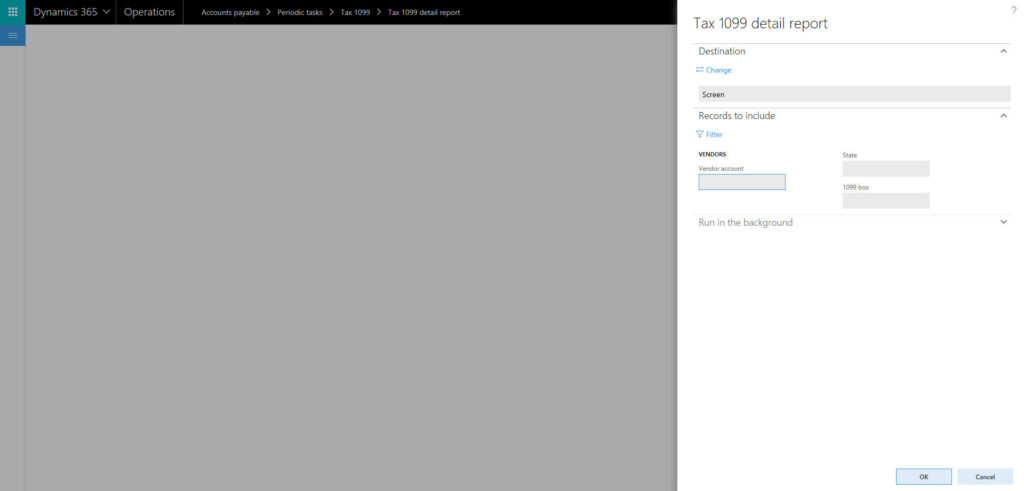
 (2) Tax 1099 detail report. This report is used to review, in detail, D365 1099 reportable amounts by vendor.
File with IRS
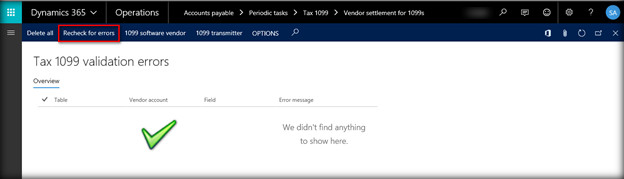
Create IRS file.
When ready to file forms with the IRS, return to the ‘Vendor settlement for 1099s’ form.
- Select Create export file button.

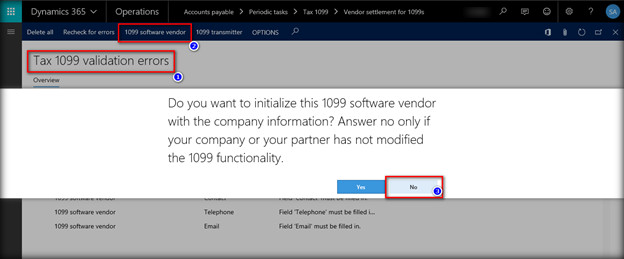
The first time you do this, you will need to indicate to D365 that you are filing these forms directly from the software (no 3rd party ISV vendor is required for this, but we need to mark this).
Return to the previous screen.
Now the ‘Create export file’ opens the file production program.
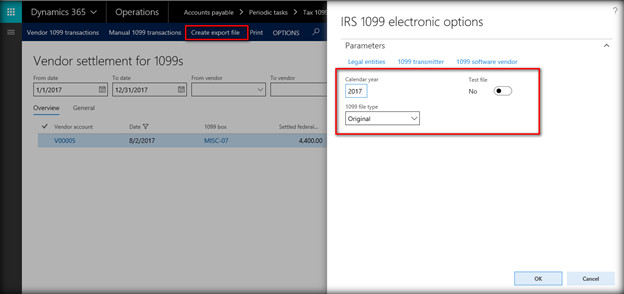
Note options for creating a Test file, which is recommended if you have never filed electronically with the IRS in the past. Since test files may take some time for the IRS to process, you should work through any file testing in advance of the 1/31/18 filing deadline.
Additional Resources for Year-End Reporting
This is also the time of year for Affordable Care Act 1095-C Reporting. We’ve created a step-by-step process, How to set-up ACA 1095-C reporting in Dynamics AX 2012 and D365, to help you put those docs together here.
About the Author:
Tyler Barron is a Senior Consultant with ITK Solutions Group. He has a retail and finance background which he has put to use helping clients put Microsoft D365 and Dynamics AX to use to solve their business problems. Tyler has worked on projects ranging from a local supermarket chain to a 600+ company shared services conglomerate.